1. Getting started
How to sign in, join your team, and find your way around.
On this page:
- The SetBenchmark website and finding your workspace
- Starting a free trial for your company
- Get started: your first test in a minute
- Signing in
- Joining your team from an invitation
- The home page
- Finding your way: the menu, search and the top bar
- Waiting for you: everything that needs a person
- Home for interviewers
- Home for employees
- Your account
- The demo account: view as every role
The SetBenchmark website and finding your workspace
www.setbenchmark.com is SetBenchmark’s public website: what the product does, pricing, skill tests, the blog and contact details. It is not where your team works. (Typing setbenchmark.com takes you there too.)
The app itself is at app.setbenchmark.com: signing in, starting a free trial, this guide, and badge and status pages. Older links on setbenchmark.com, such as setbenchmark.com/login or setbenchmark.com/guide/, still work and take you to the same page on app.setbenchmark.com.
To get to your company, click “Log in” on the website (or open app.setbenchmark.com/login), then “Sign in with your email”: after you sign in you see every company your email belongs to. Or open your company’s own address directly, such as kombee.setbenchmark.com. Candidates never need the homepage: their invitation email has their own link.
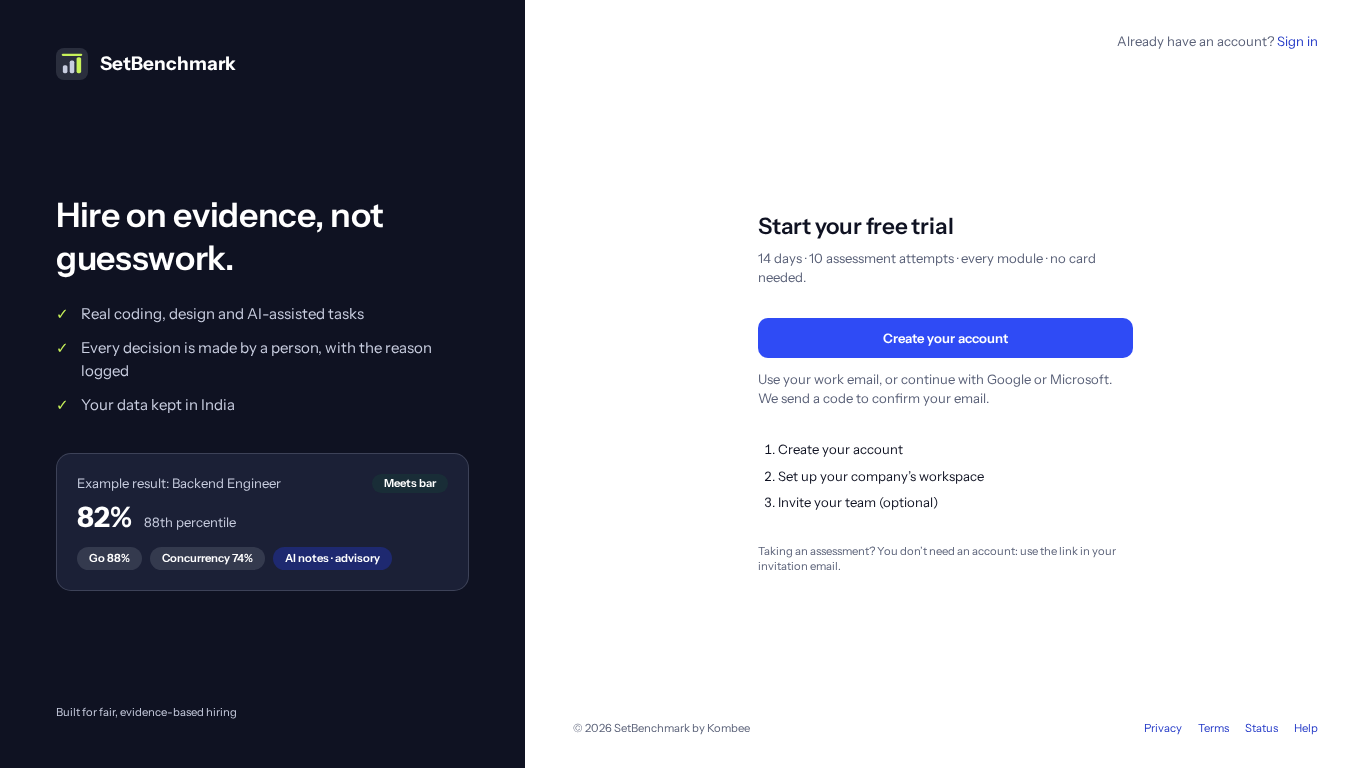
Starting a free trial for your company
The trial is free for 14 days, with 10 assessment attempts and every module switched on (AI use is capped). No card is needed. When it ends, the company moves to the free plan unless you choose a paid one under Settings → Billing, which shows the trial and its end date until then.
A company trial needs a work email. Personal addresses such as Gmail, Yahoo, Outlook.com, iCloud or Proton can’t start one, because your teammates join by your company’s email domain. If you sign up with one, you are told straight away after confirming your email, with a button to sign out and sign up again with your work email.
One person can start at most 3 trials in 30 days. If “Start free trial” is missing, sign-up is switched off for now: ask Kombee to set up your company.
On the Pricing page, plans priced only in rupees show their rupee price with “billed in INR” when you look at another currency.
How to do it:
- On www.setbenchmark.com click “Start free trial” or “Sign up” (it opens app.setbenchmark.com/signup). You can also open app.setbenchmark.com/signup directly.
- Click “Create your account”. Enter your work email (you@yourcompany.com) and choose a password of at least 10 characters, or continue with your work Google or Microsoft account.
- Type the 6-digit code we email you.
- Back on SetBenchmark, “Set up your workspace”: your name (shown to your team), your company name (shown to candidates), your workspace address (filled in from the name; it says “✓ Available” or suggests a free one), country, time zone, where your data is kept (India for now), how many engineers you hire a year, and tick the Terms. Click “Create workspace”.
- You are taken straight into your new workspace at its own address, for example yourcompany.setbenchmark.com, already signed in, on “Get started”: pick the role you’re hiring for and your first test is published in a click (see “Get started: your first test in a minute”). Home shows “Free trial: 14 days left”. Next time, sign in at that address.
Get started: your first test in a minute
A new company opens on “Get started” (also on Home, under Quick start). It has four steps, each done on the page.
1. Make your first test: click the role you are hiring for, such as “Backend developer (Node.js)”, “Python developer” or “Data analyst (SQL)”. There are 14: Node.js, React, full-stack JavaScript, JavaScript, Python, Java, Go, SQL, data science (with a notebook), DevOps, AWS, QA, data structures and algorithms, and system design (with a whiteboard task). A ready test from SetBenchmark’s reviewed question library is made and published in a second or two, with its link to copy and send to candidates. Each role shows how many questions it gets and how long the test is. Hiring for something else? “Paste a job description” makes a test with AI instead (about 20 seconds). Change anything in the test later.
2. See a finished result: the first time, a sample candidate takes your starter test, and within a minute or two “Open the sample candidate’s result” shows what a marked result looks like.
3. Try your test as a candidate yourself: “Take the test as a candidate” opens it on the candidate site in a new tab, as your candidates will see it.
4. Bring in your team: invite recruiters, hiring managers and interviewers.
Once your first test is published, the page says how long it took from signing up.
Tip: Sample candidates (the example and your own tries) are marked “sample”: they use no credit or trial attempt and aren’t counted anywhere. Delete them whenever you like.
Signing in
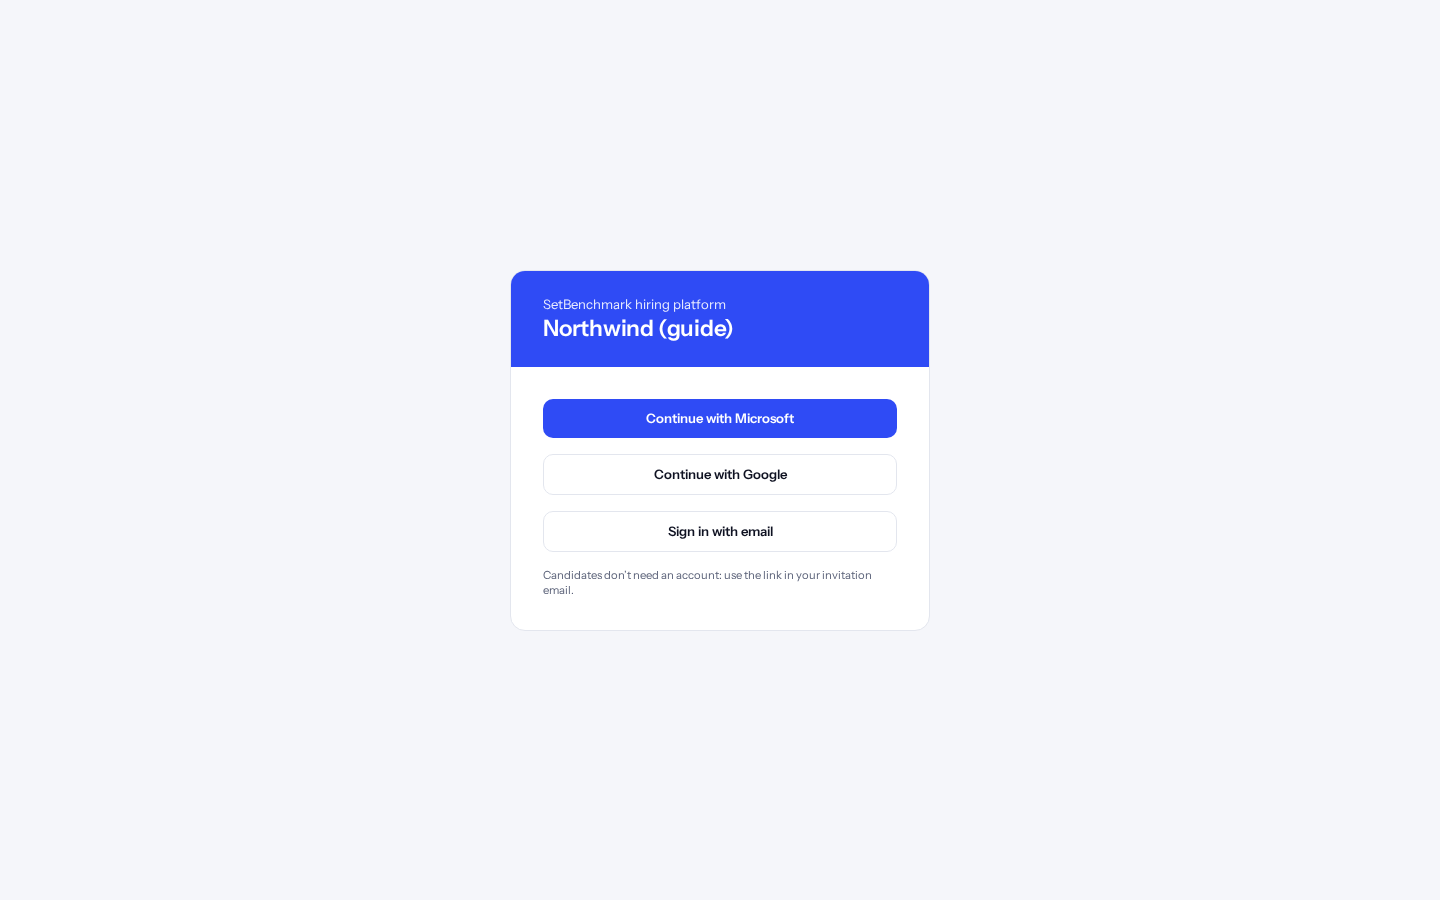
Open your company’s own address, for example northwind.setbenchmark.com. The form is on the right of the page, with your company’s name (and logo, if it has one) above the sign-in buttons.
Choose how to sign in. Your admin decides which ways are allowed: your company’s single sign-on, Microsoft, Google or your email address.
How to do it:
- Open your company’s address.
- Click the way you sign in, for example “Continue with Google”.
- Follow the steps on the next screen. You come back to SetBenchmark signed in.
Tip: Candidates never sign in here. They use the link in their invitation email.
Tip: You are asked which account to use every time: Google and Microsoft show their list of accounts, and email sign-in asks again. Pick the work account your admin added. “No active account for this company” means the account you picked isn’t on this company’s team.
Tip: Forgot your password? Choose “Sign in with email”, type your address, then “Forgot password?”. The reset email comes from the sign-in service. Finish within 30 minutes, in the same browser. If the reset link opens in another browser, the new password is still saved: go back to your company’s address and sign in again.
Tip: If you are signed out after a while without activity, simply sign in again. Your work is saved.
Joining your team from an invitation
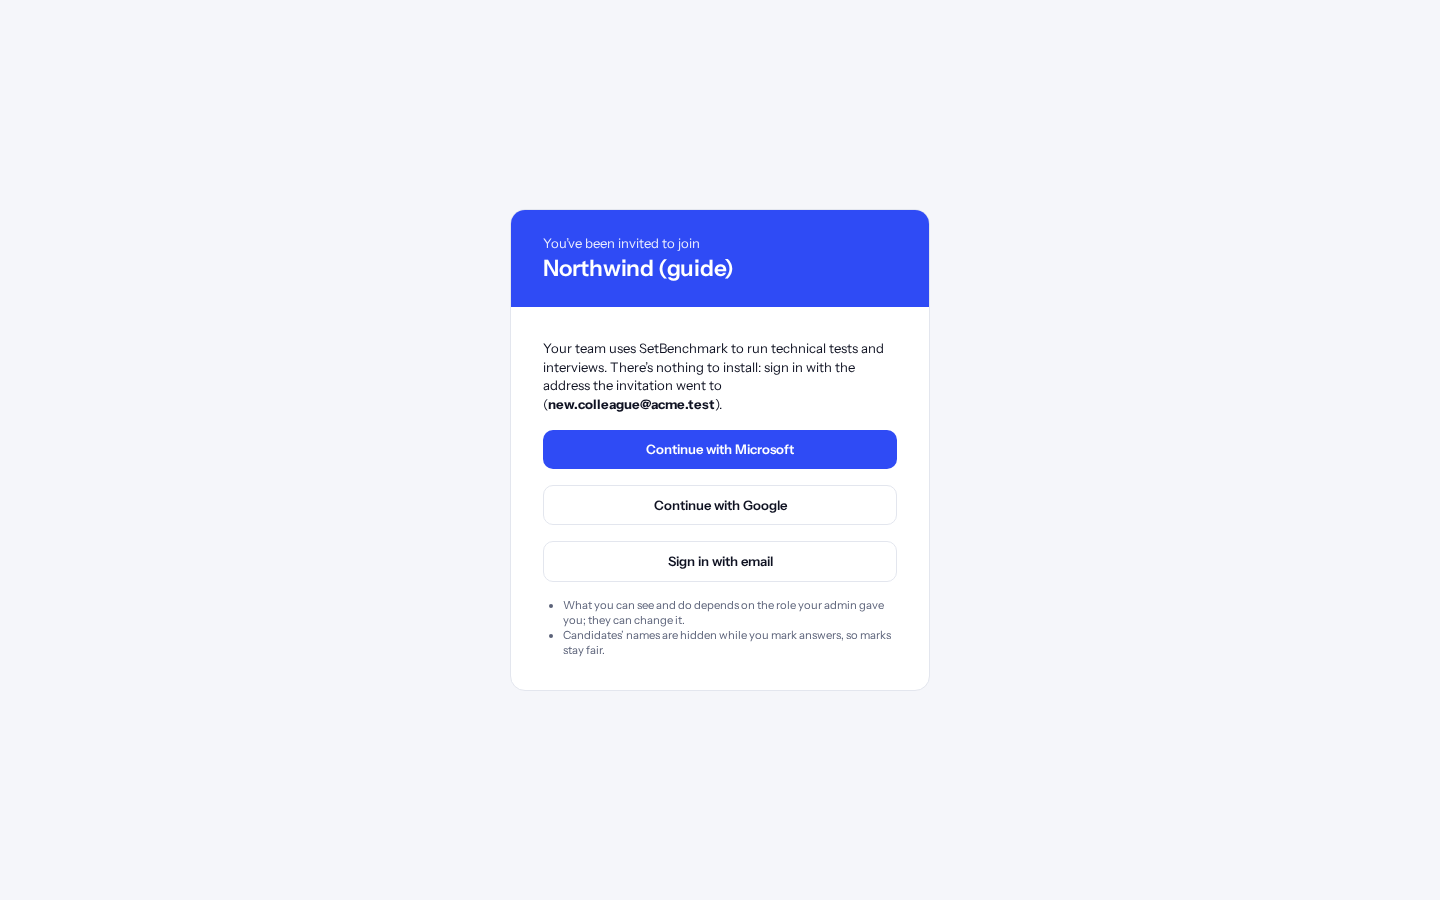
When an admin adds you to the team (as staff or as an employee for skills tests), you get an invitation email. Its link opens this page, with your company’s look and your email address filled in.
How to do it:
- Open the link in the invitation email.
- First time? Click “Create your account”, choose a password and confirm your email. Already have an account? Click “I already have an account: sign in”.
- Use the same email address the invitation was sent to. If you see “No active account for this company for …”, you signed in with a different address: sign out of it and try again with the invited one.
The home page
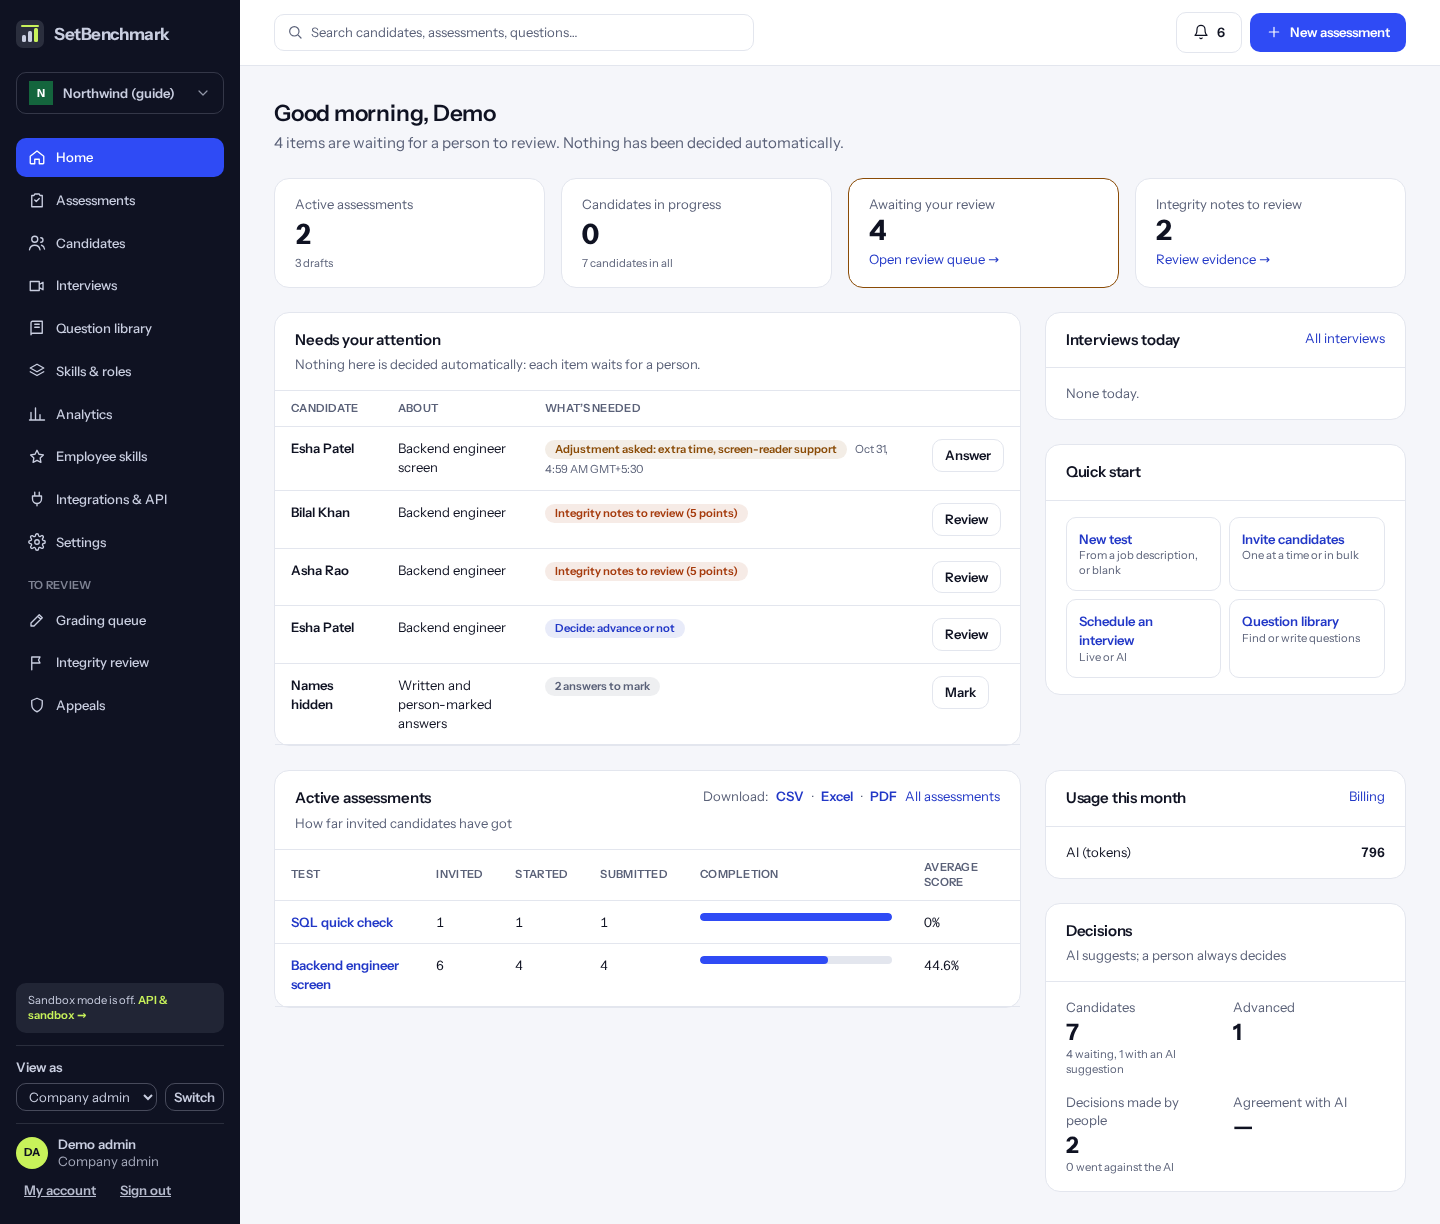
After signing in you land on the home page. It greets you by name and says how many items wait for a person to review. Nothing on it has been decided automatically.
Four numbers run along the top: active assessments (and drafts), candidates part-way through a test, items awaiting your review, and integrity notes to review.
“Needs your attention” lists, for example: requests from candidates, appeals, integrity notes to review, candidates to decide on (everyone who has finished a test and has no decision yet), and written answers to mark. Each line has a button that takes you straight there.
“Active assessments” shows how far invited candidates have got in each test. On the right are today’s interviews, “Usage this month” (for people who may see usage, with the plan’s limits) and “Decisions”: how many candidates were advanced, how many decisions people made, and how often they agreed with the AI.
Tip: Nothing on this page is decided by software. Every item waits for a person.
Finding your way: the menu, search and the top bar
The left menu is in this order: Home, Assessments, Candidates, Interviews, Question library, Skills and roles, Analytics, Employee skills, Integrations and API, Settings. You only see what your role and your company’s plan include. Grading queue, Integrity review and Appeals sit with the work they belong to.
At the top of the menu is your company’s name. Click it and choose “Switch company” if you work for more than one company.
At the bottom is your card: your name, initials and role, with “My account”. People who manage API keys also see whether sandbox mode is on, with a link to it.
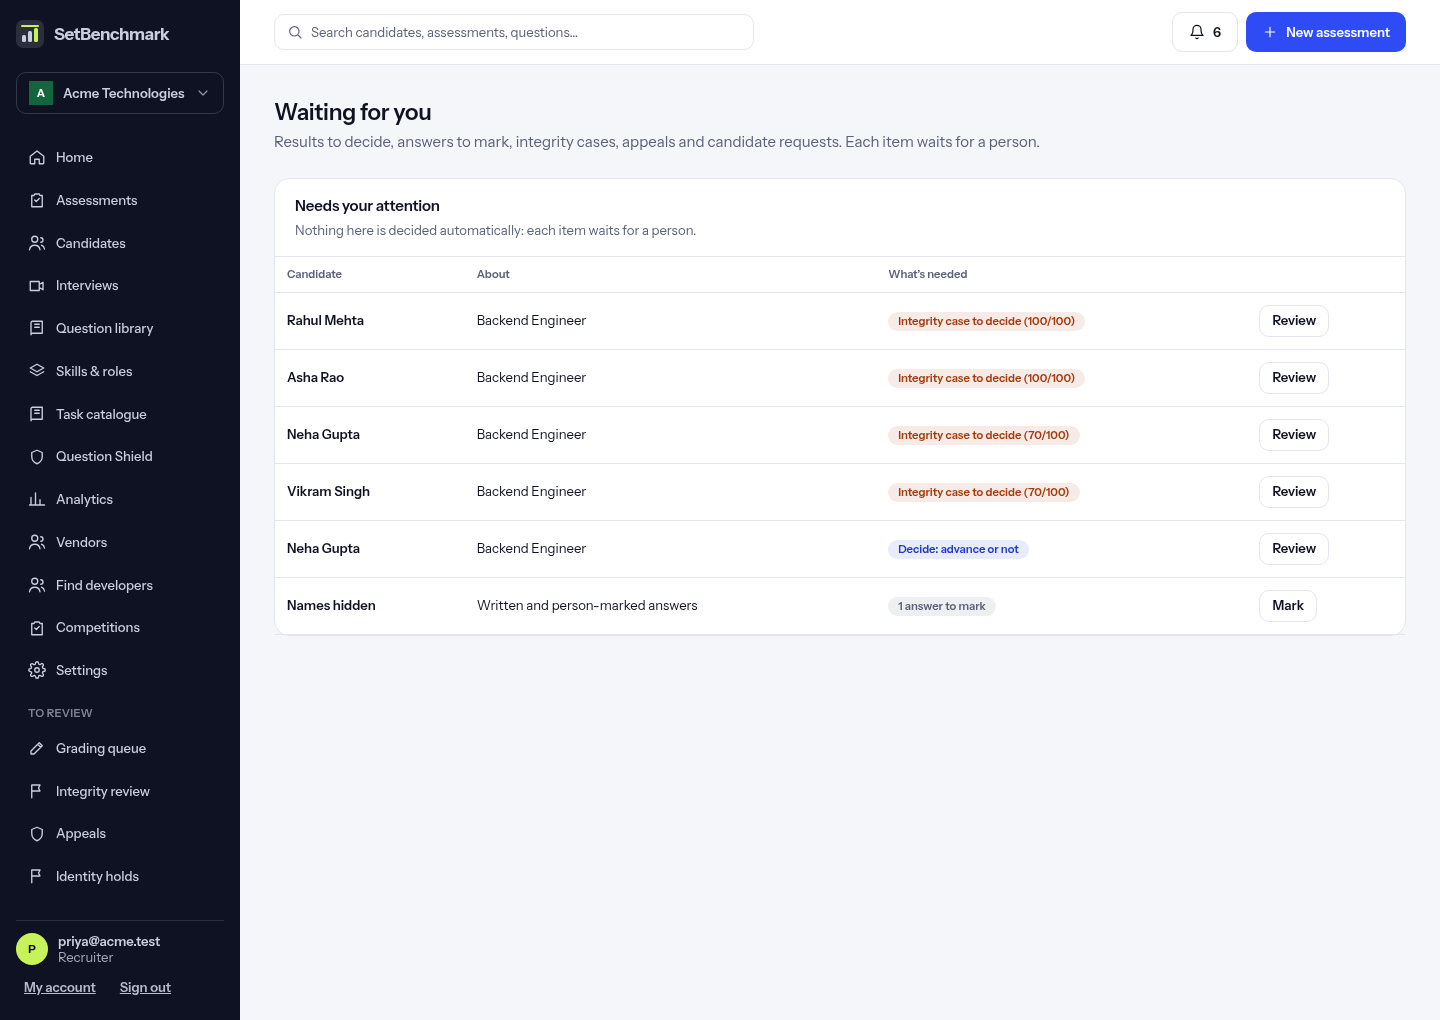
The top bar has a search box: as you type a name, a test title or a question, a few matches appear under it (use the arrow keys and Enter, or click one). Press Enter without choosing one to see all matching candidates, assessments and questions on one page. The bell (your notifications) shows how many items wait for you; click it to open “Waiting for you”, a page with every item (Home shows the first ten). And “+ New assessment” (for people who make tests) starts a new test.
Waiting for you: everything that needs a person
Click the bell in the top bar to open “Waiting for you”. It lists everything that is waiting for someone: results to decide, written answers to mark, integrity reviews, appeals and candidate requests. The number on the bell is how many there are; Home shows the first ten.
Each row says who it is about, what it concerns and what is needed. Click “Review” or “Mark” to go straight to it. Answers to mark show “Names hidden”, so marking stays blind. Nothing on this page is decided automatically: each item waits for a person.
Home for interviewers
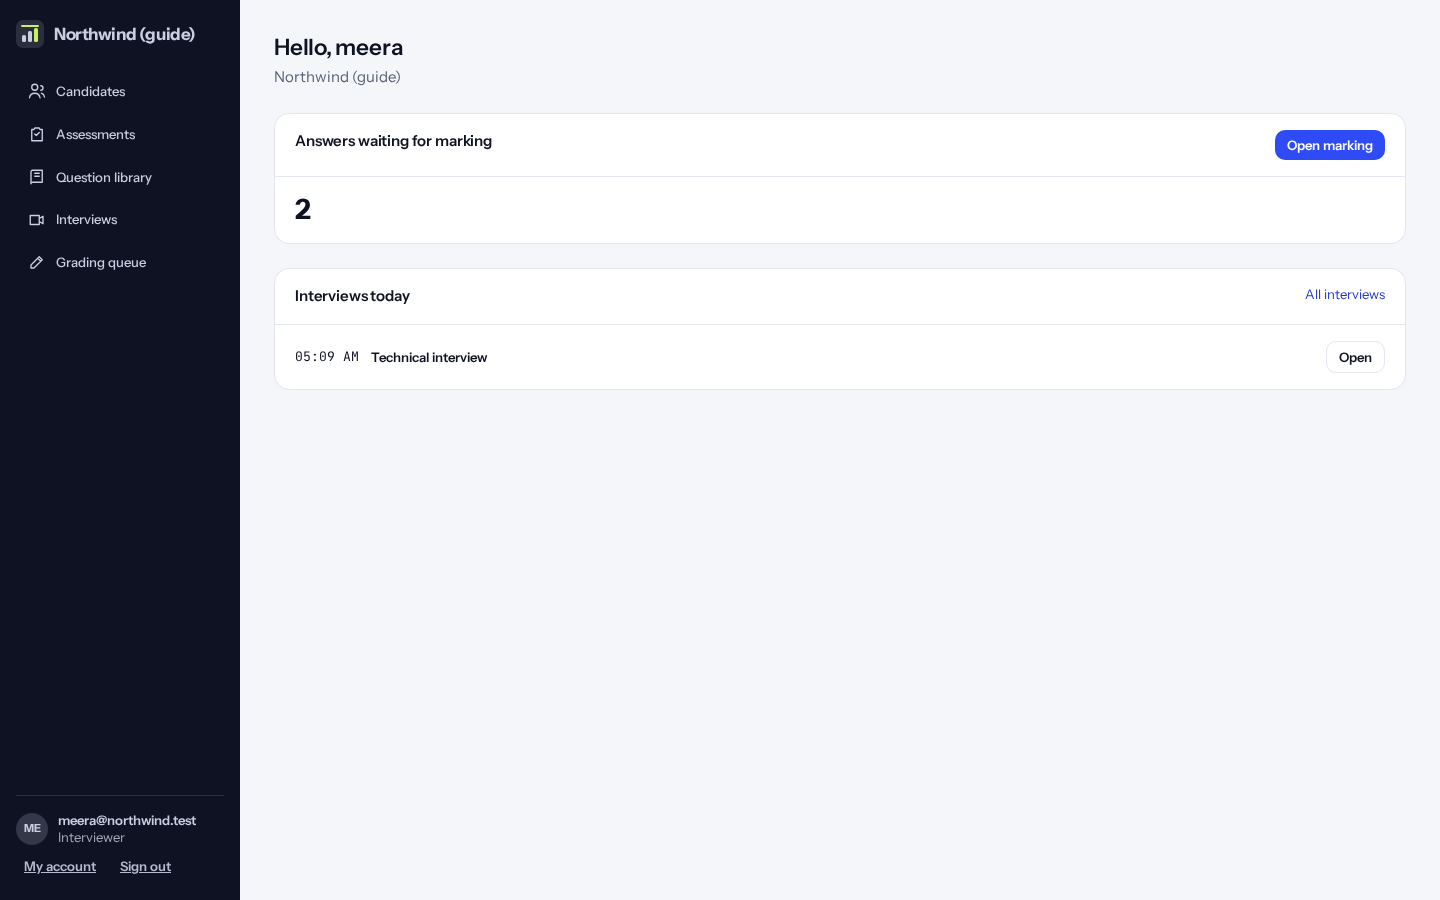
Interviewers see their own work: answers waiting to be marked and today’s interviews.
Home for employees
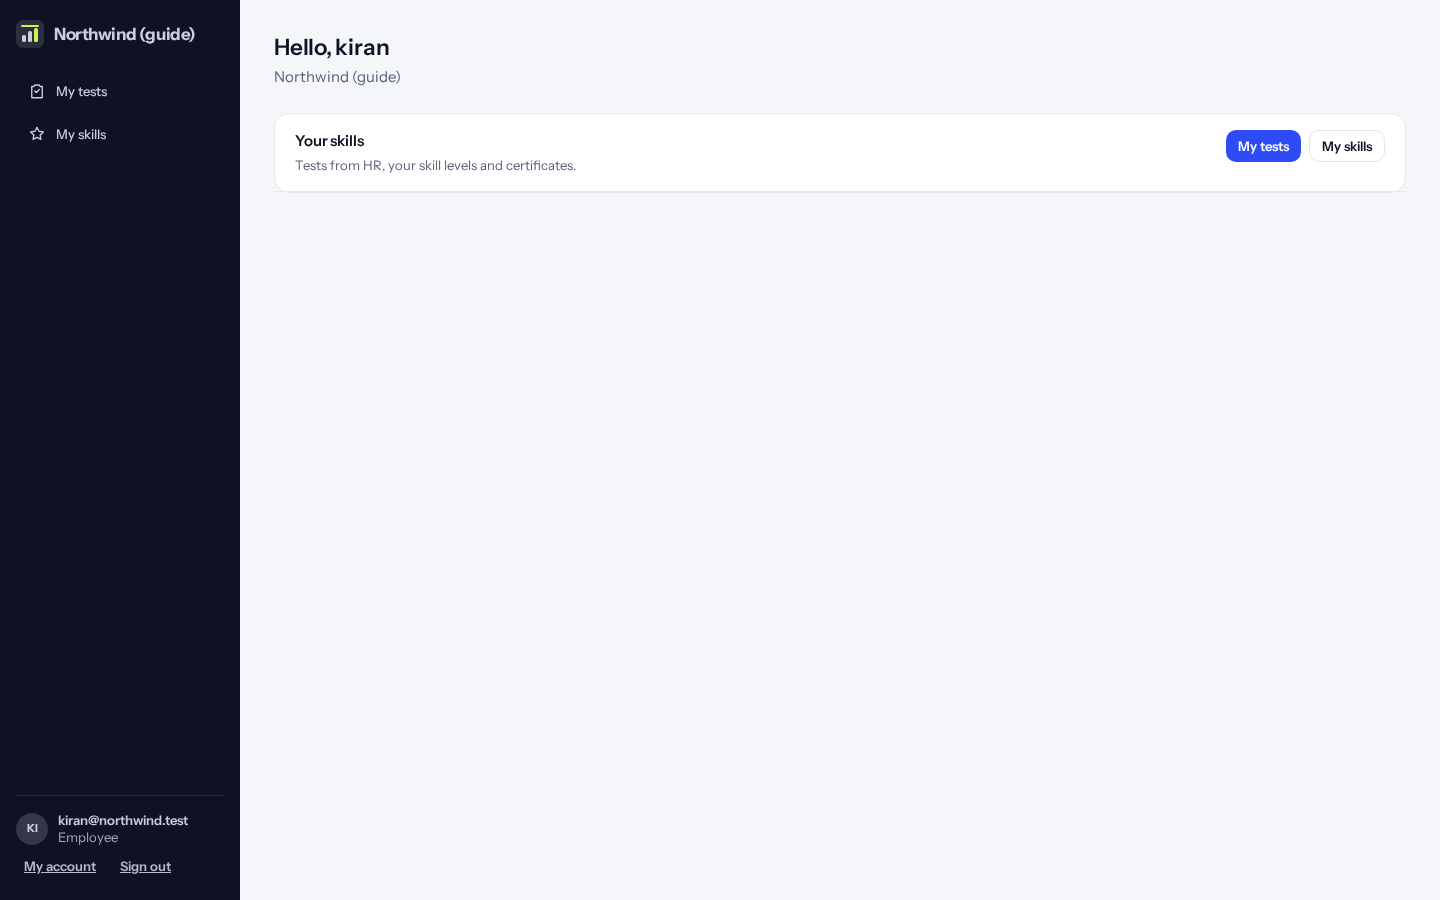
Employees see links to their skill tests and their skills.
Your account
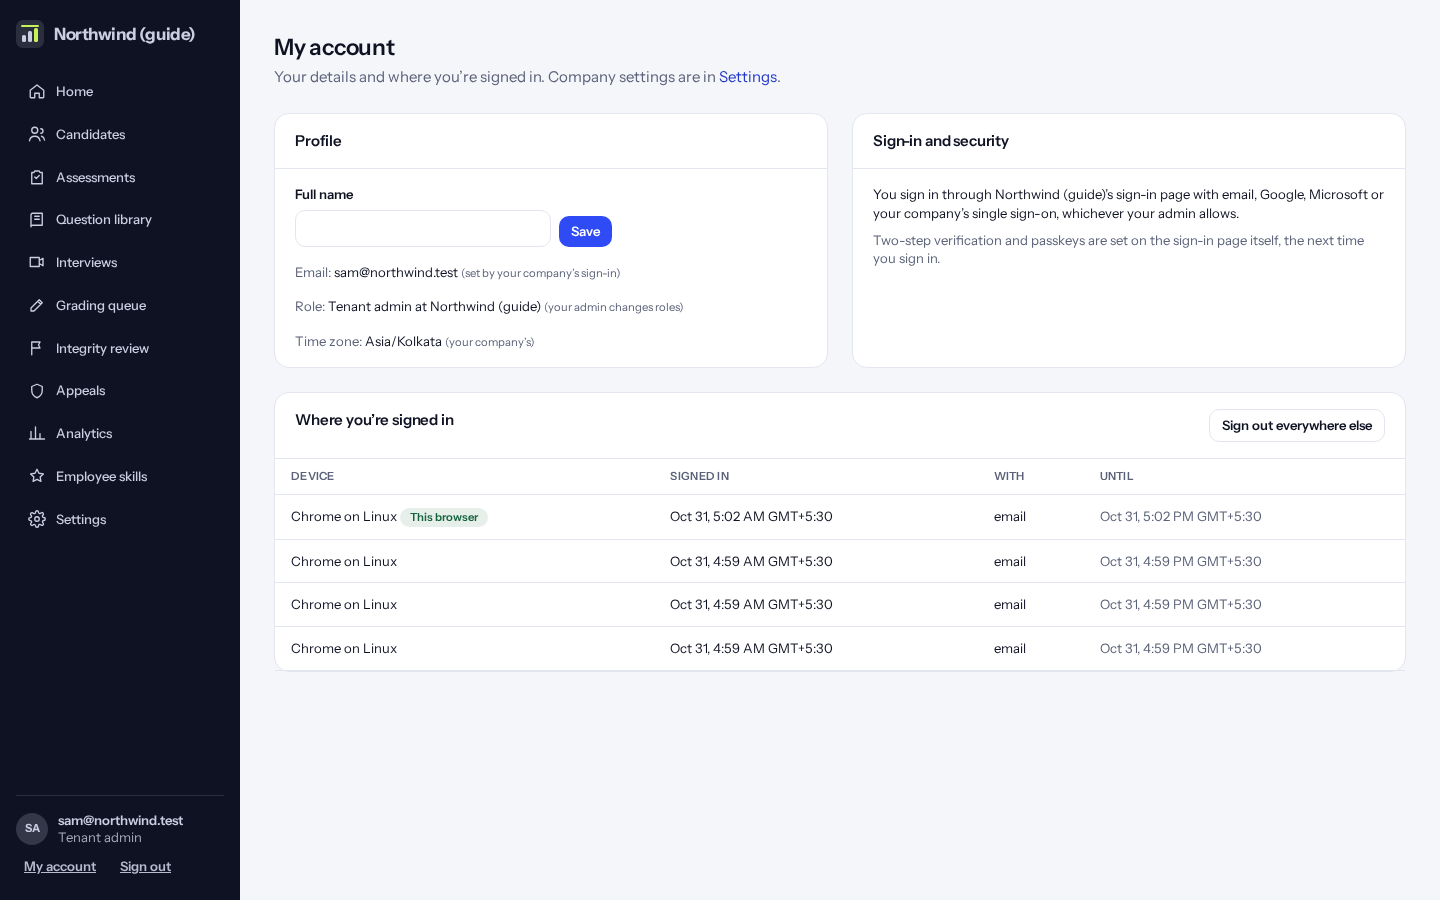
Click “My account” at the bottom left. Add your full name, see your role and time zone, and see where you are signed in. “Sign out everywhere else” signs out every other device, for example a computer you no longer use.
The demo account: view as every role
A demo company can have one demo account. It signs in with one email and password like anyone else, and then sees a “View as” menu at the bottom left, above its name.
Pick a role and click “Switch”: Company admin, Recruiter, Hiring manager, Interviewer, HR manager or Employee opens the product as that company’s sample person with that role, so you see exactly their menus and pages. Choose Company admin to switch back.
Candidate makes a new sample candidate, invites them to the company’s oldest published test and opens the candidate site, as if you clicked the link in their email. Your staff screen stays signed in: go back to the company’s address to carry on.
Super admin (platform console) appears when the demo email is also on the Kombee staff list. It opens the platform console on the main address, which asks you to sign in there with the same email and password. The menu says so beside the role. That sign-in is separate and doesn’t last as long as your company one, so you may be asked again.
Only Kombee can make a demo account, from the server (pnpm db:role-switcher). Nobody can turn it on from the screens or the API.
How to do it:
- Sign in with the demo email and password.
- At the bottom left, open “View as” and pick a role.
- Click “Switch”.
- To come back, pick “Company admin” and click “Switch”.